To upload your file or files, you can click on Launch > 1. Upload/view files at the top of your screen, and then click on ![]() .
.
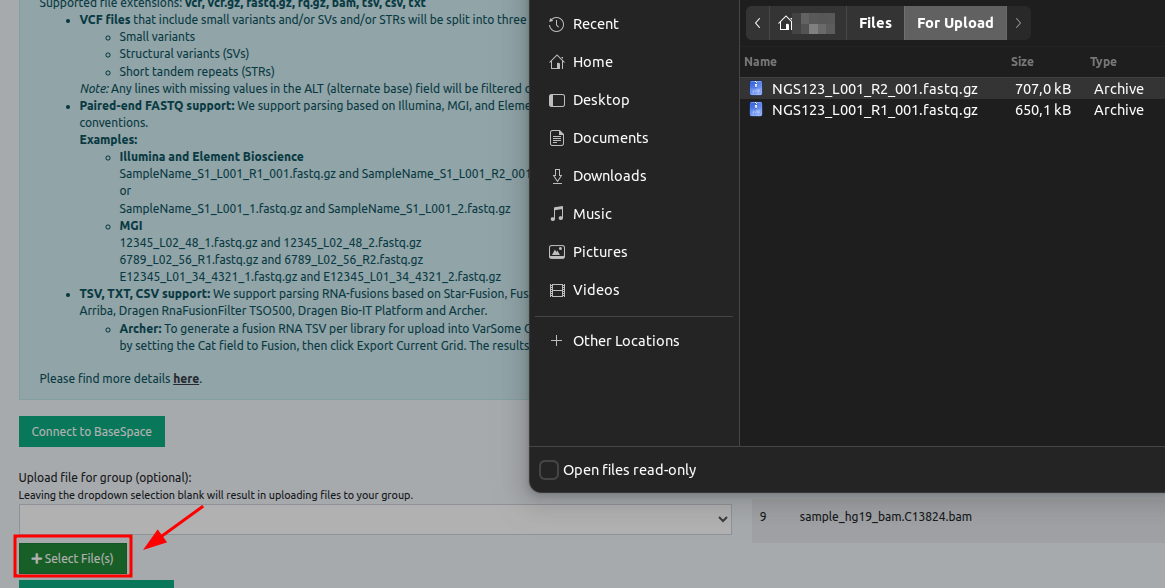
You can also connect your Illumina BaseSpace account.
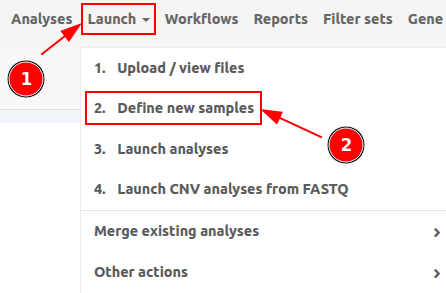
To create your samples you need to navigate through:
Launch > 2. Define new samples
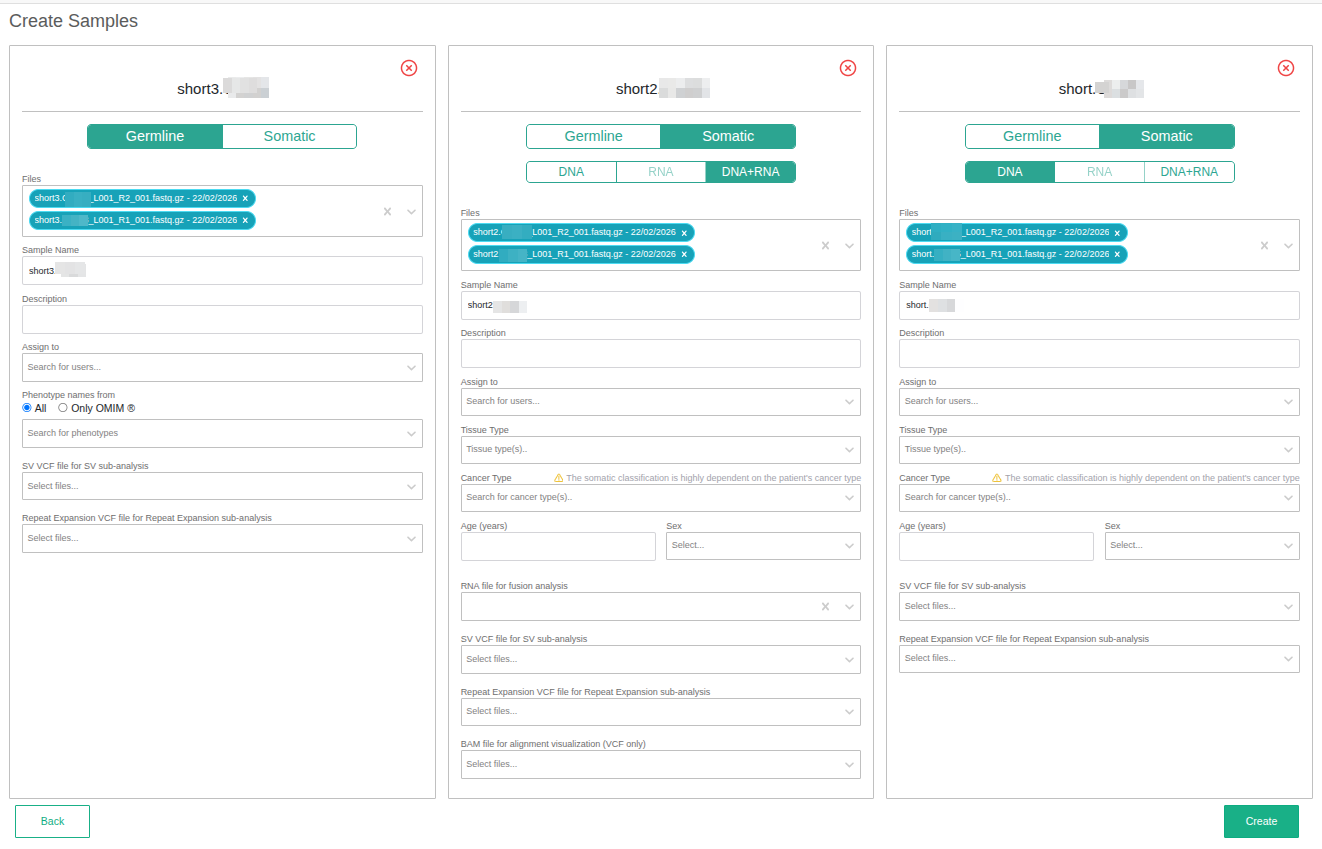
You can then define which files are associated with which sample name and you can optionally attach additional information to the sample (e.g phenotypes).
Please note that SV and/or Repeat Expansion VCFs do not need to be defined separately, as they can be added during the sample definition of the main analysis.
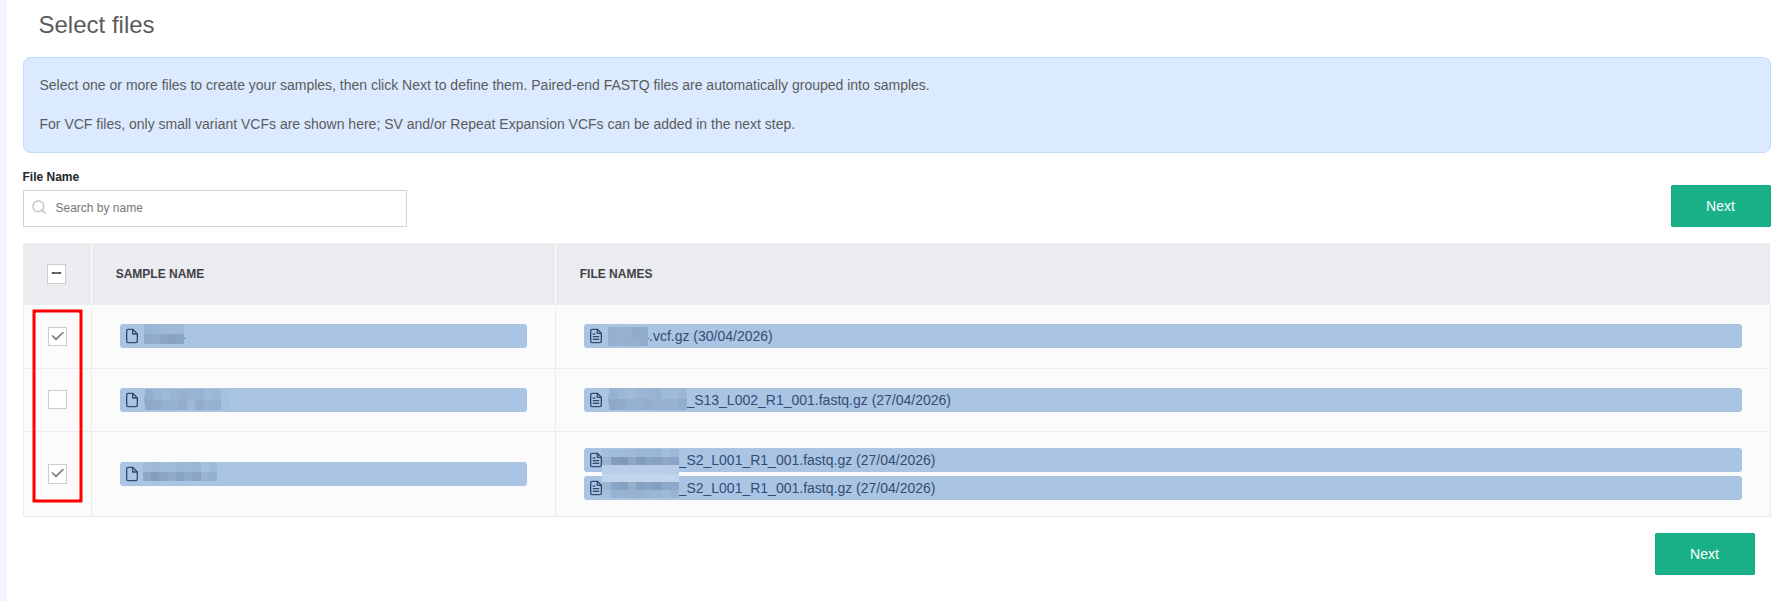
To select all files from the table, you can simply check the box on the top left:
FASTQ files are grouped according to the Illumina or MGI naming convention and are given a suggested sample name. The suggested name and associated files can be modified in the following screen. For VCF files - each VCF is associated with a suggested sample name.
Launch > 2. Define new samples > Next: for adding more information to the sample, notes, phenotype, etc.
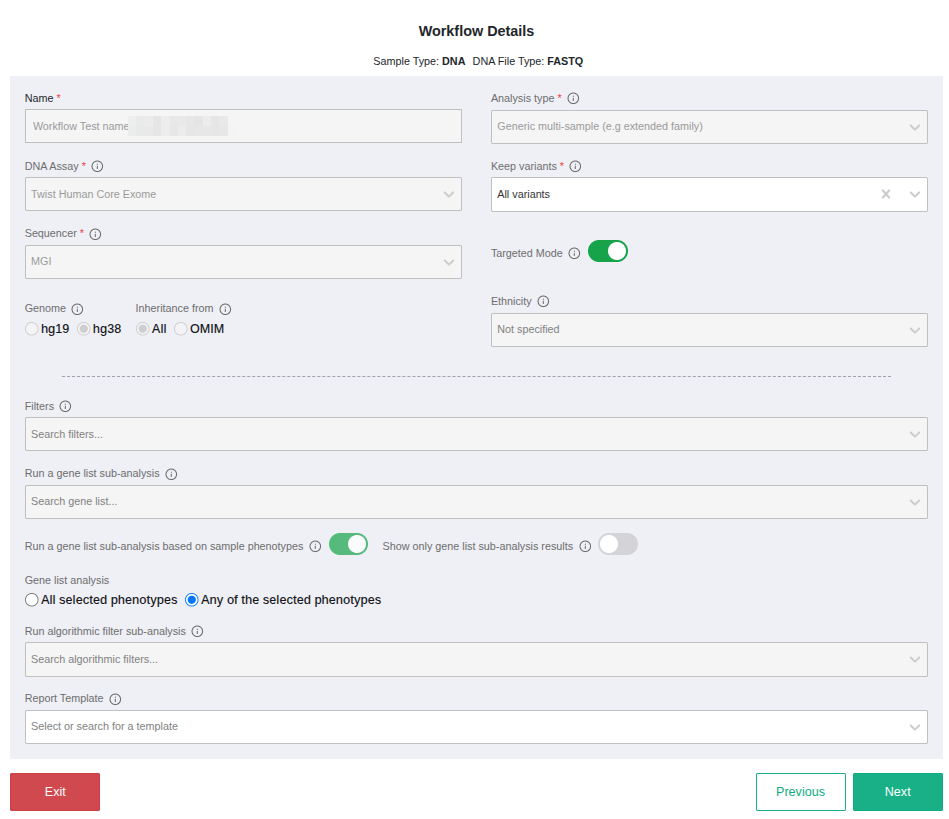
Create a workflow
Only the group supervisor is capable of editing each workflow’s parameters. To do that, the group supervisor must navigate to: Workflows > Add new
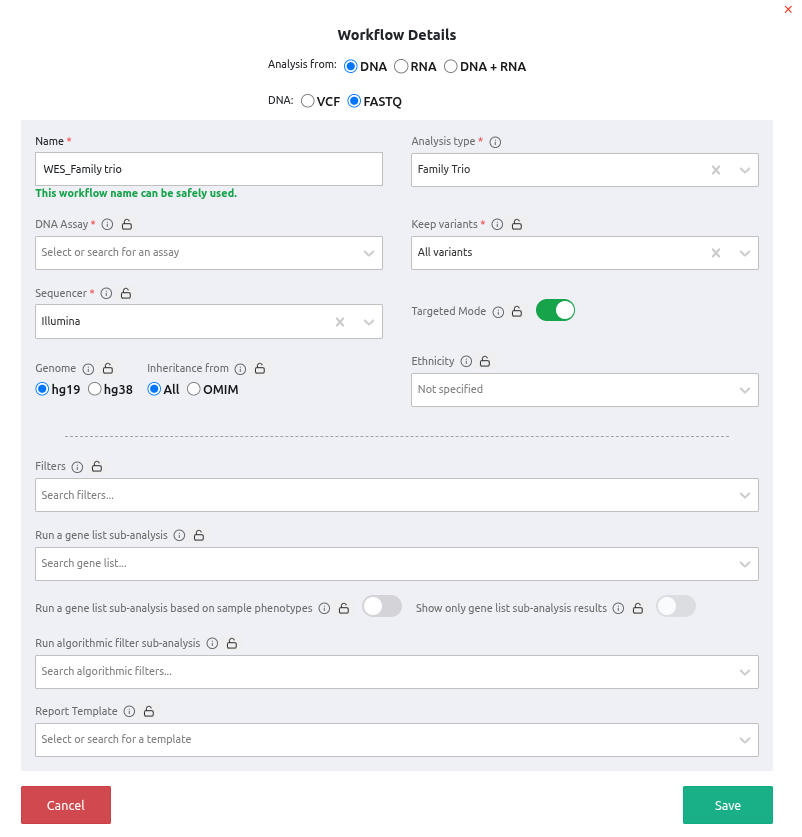
You can use the locks to set fixed values in the workflow field
Example of a DNA+RNA fusion workflow

Example of an RNA fusion workflow
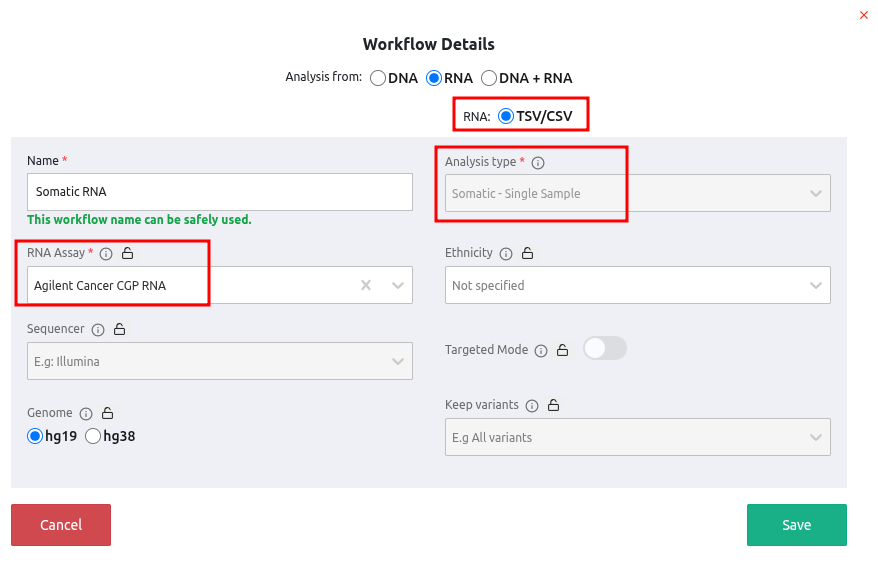
⚠️ Please note that in this case the Analysis Type field will display only the Somatic Single Sample option.
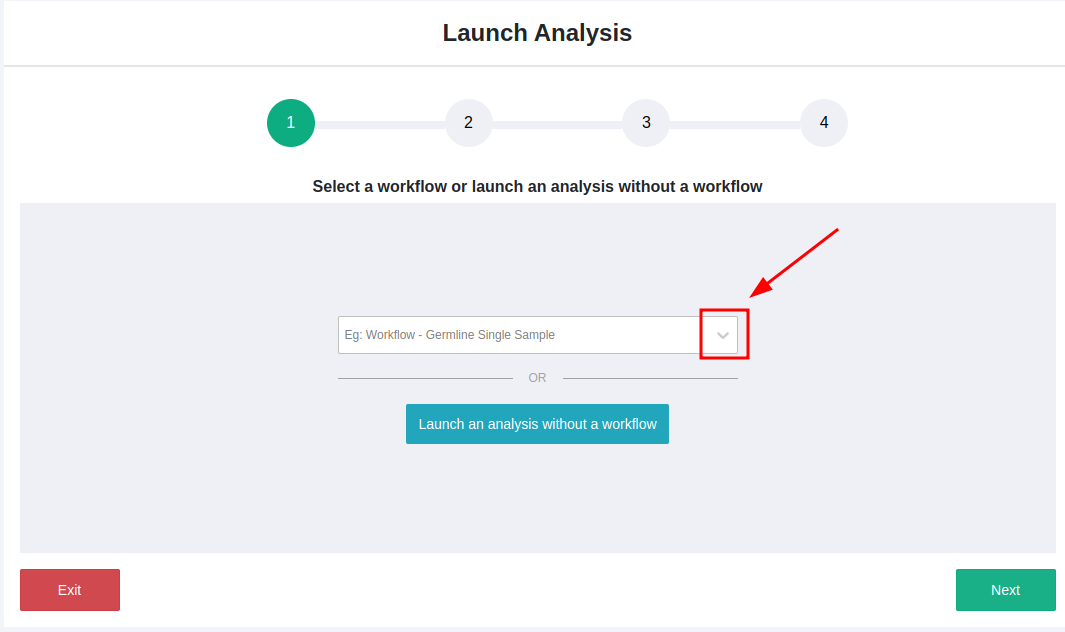
Then, navigate to Launch > 3. Launch analyses:
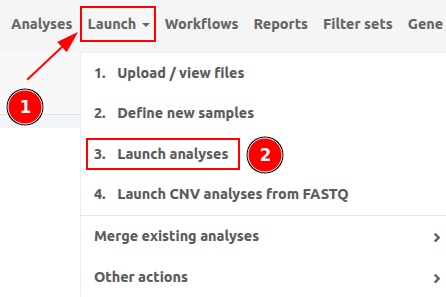
From the dropdown menu, select an existing workflow.
Group supervisor can disable the “Launch an analysis without a workflow” option in “Analysis preferences”
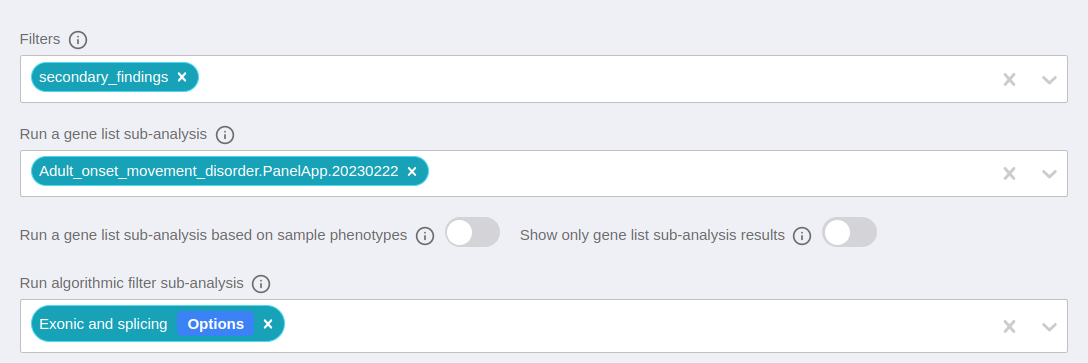
(Optional) define filters and sub analyses to reduce manual steps
You can specify which filters you would like to launch once the analysis is complete as part of the workflow.
You can launch an analysis using an existing workflow. Analysis parameters are loaded as defined in the workflow by the group supervisor. Some fields may be fixed if the supervisor has locked them. Other fields may have a default value (defined by the supervisor) but can be modified.