VarSome Clinical allows you to create 43 different filter sets:
-
Create new set
-
Create new set (SV Results): specific filter sets for CNV analysis’ results.
-
Create new set (RE Results): specific filter sets for Repeat expansion analysis’ results.
-
Create new set (Fusion Results): specific filter sets for Fusion analysis’ results.
Create a Filter Set
It is possible to create a filter set directly from the analysis results or from the “Filter sets” menu.

More information about the redesigned dynamic filters with AND/OR logic can be found in the article Preview of redesigned dynamic filters with AND/OR Logic.

From the analysis results:
- Click on the Filters icon
to create and manage filter sets, which you can use on multiple samples. You can duplicate sets, reorder filters within sets or drag and drop filters from set to set.

- Click on the Create icon
to create a new filter set.
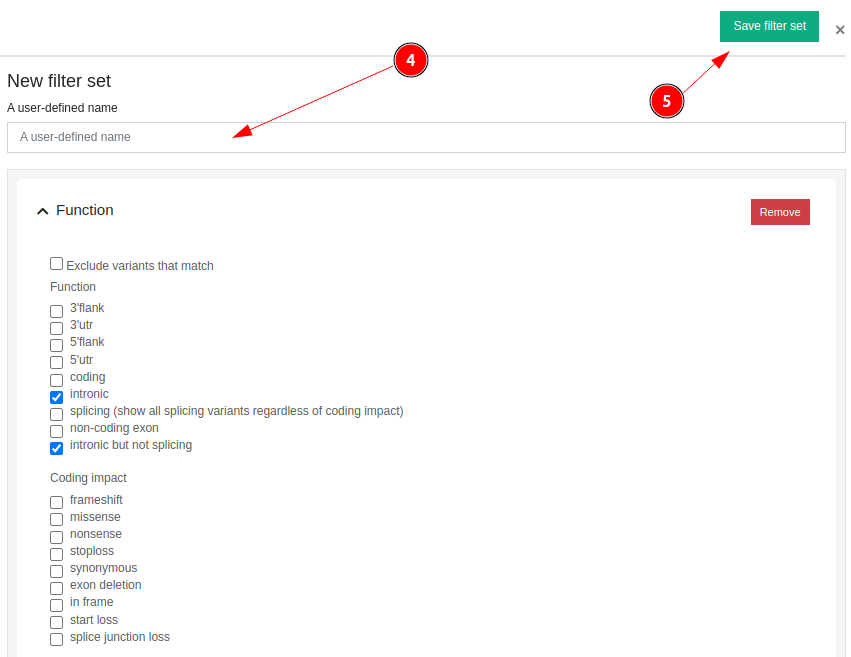
A pop-up window called Filter set will appear. This window is split into two columns: Available Filters and New Filter set. The available filter sets can be selected by clicking on the green box ("Add") next to each filter’s name. If you select a filter, the filter will move to the other column. By clicking on the "filter name" or the arrow, a form is displayed where the filter can be edited. Once you have finished editing your new filter set, give it a Name and click on Save filter set.
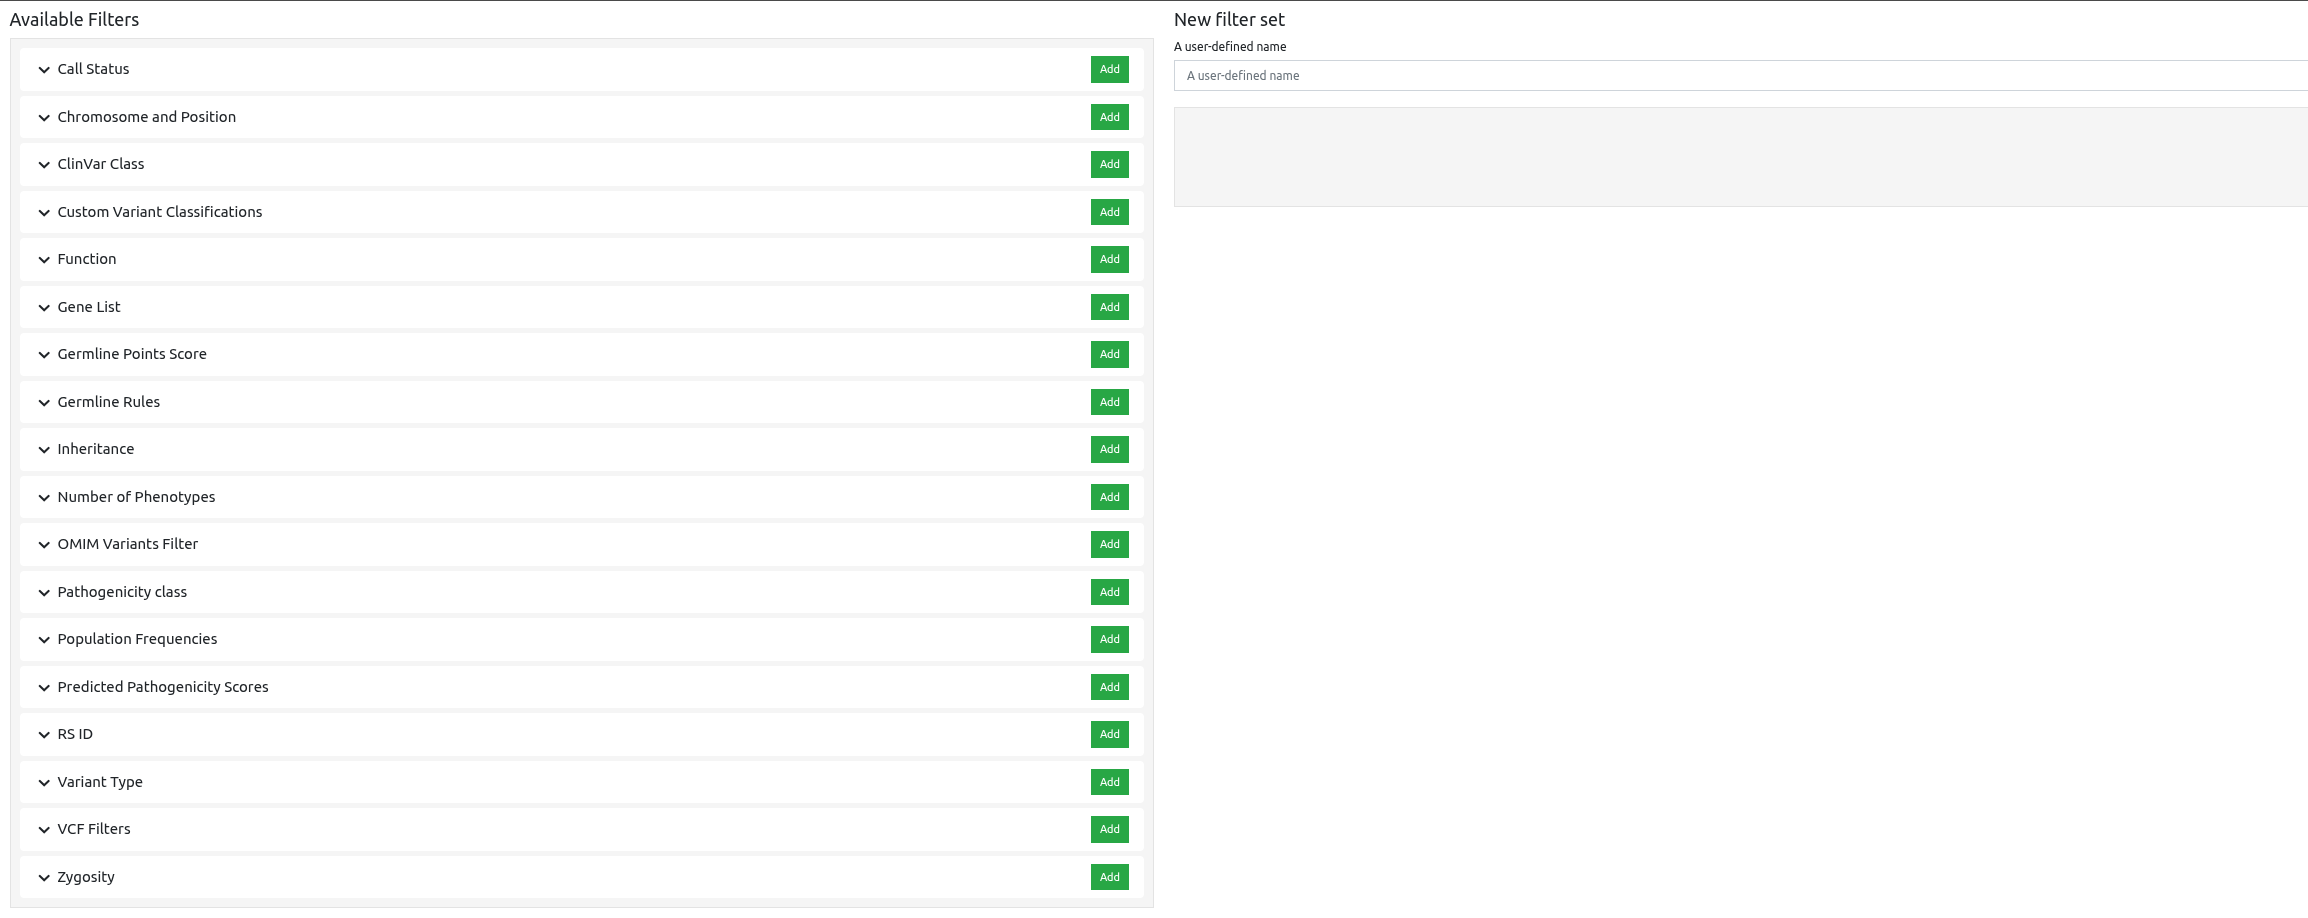
For example, to create a filter to show all the variants except those that are only intronic, click on the Functions filter and then to "intronic" and "intronic but not splicing" functions as shown in the pictures below.


By clicking on the Add button the filter will move to column “New filter set” in which you can give to your filter the name you want, you can edit your filter and finally you can save it by clicking on the "Save filter" set button
.
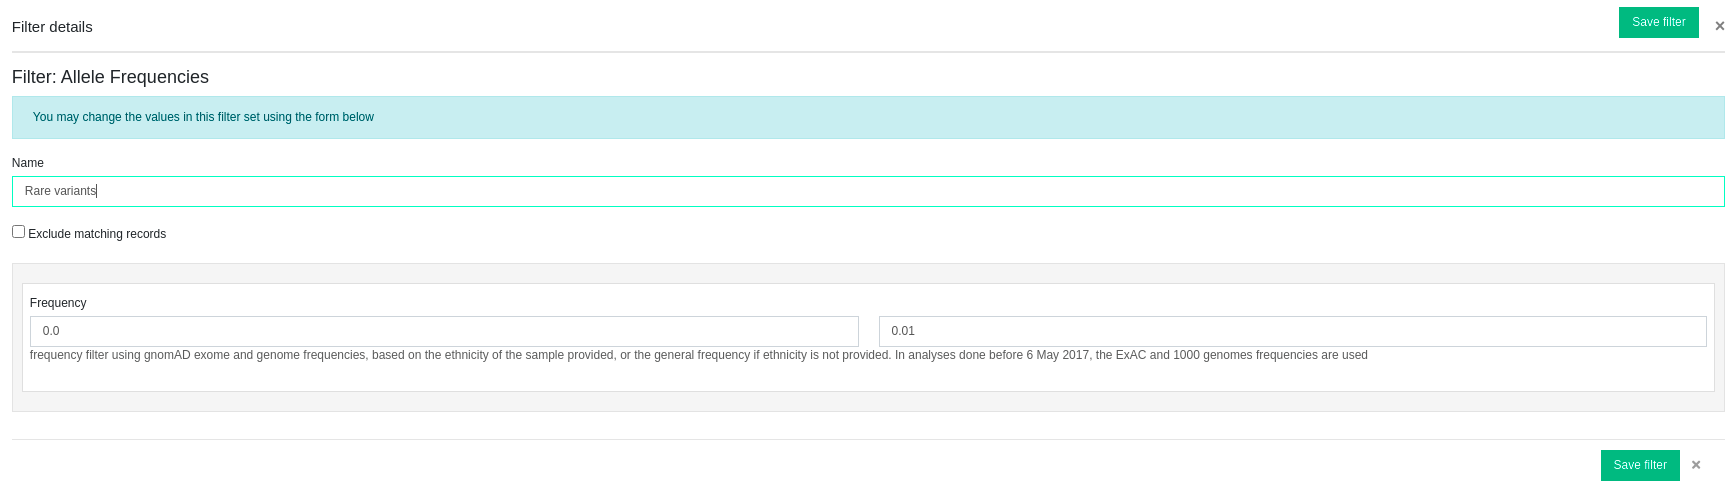
You can modify the name of the filter set by clicking on ![]() . In this example, the filter set "Population Frequencies" will be renamed to "Rare Variants":
. In this example, the filter set "Population Frequencies" will be renamed to "Rare Variants":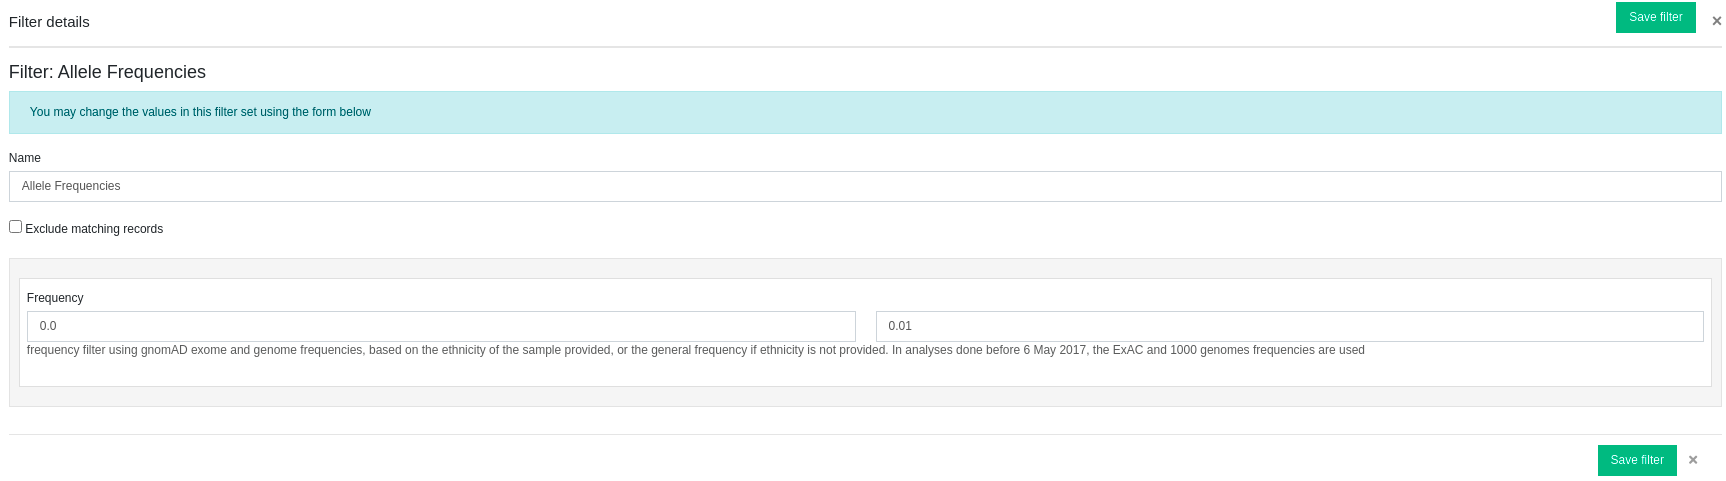
![]()
The dynamic filter "VCF filters" is specifically for values in the FILTER field of the VCF file.

These could include "PASS" or "FAIL" or, for somatic analyses using tools like Mutect2 and FilterMutectCalls, terms like "germline" or "clustered_events".
The filter is treated as a string and these values can be found in the Filters column, as shown below.

In SV analyses (CNVs and/or any other type of SV analyses) you can filter the results by variant type as shown below:

You can also filter them based on the overlap with known SVs. More information can be found in the document Overlap with known SV.
Examples and more information about fusions filtering can be found in the document How can I filter and export Fusions.
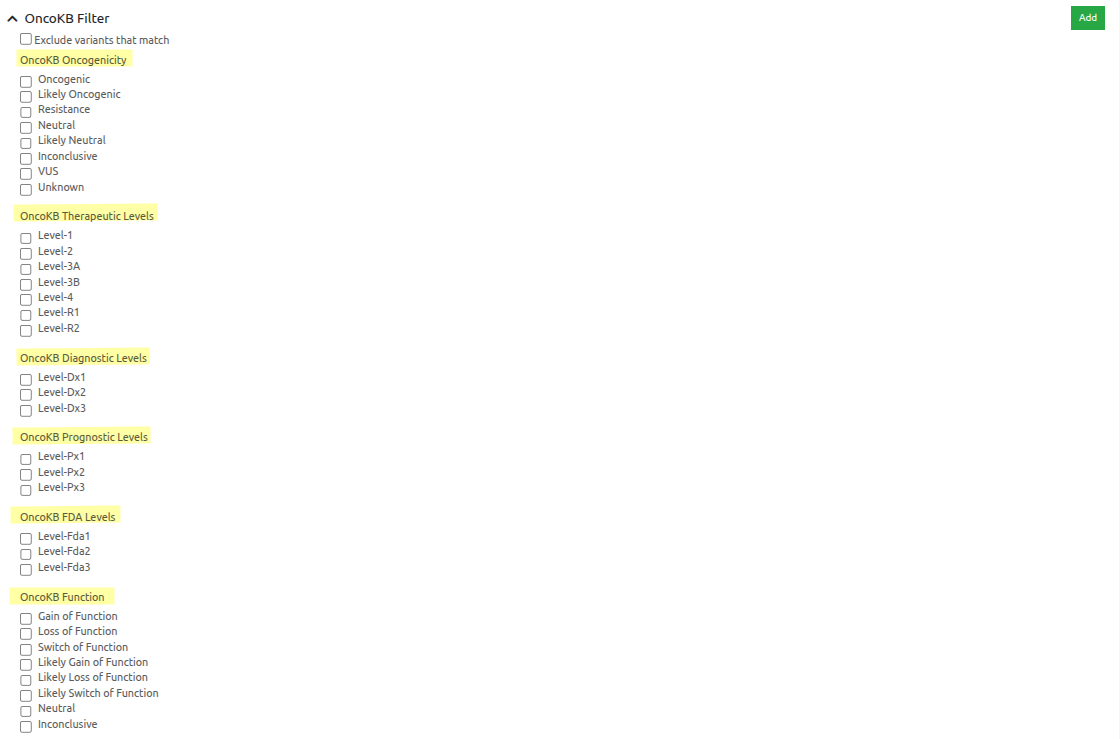
In somatic analyses you can filter your results based on OncoKB Oncogenicity, OncoKB Function and OncoKB levels of evidence using the OncoKB Filter.
Call Status Filtering in Trio Analyses
In a trio analysis, the Call status filter we do not filter out variants with a dot (.) genotype when at least one of the trio members (father, mother, or proband) lacks a genotype.
These cases occur when at least one of the samples does not have a genotype. In such situations, we choose not to filter out the variant, even if one or two samples pass the filter while the others do not. This approach ensures that potentially relevant variants remain in the analysis despite missing genotype data in one of the trio members.
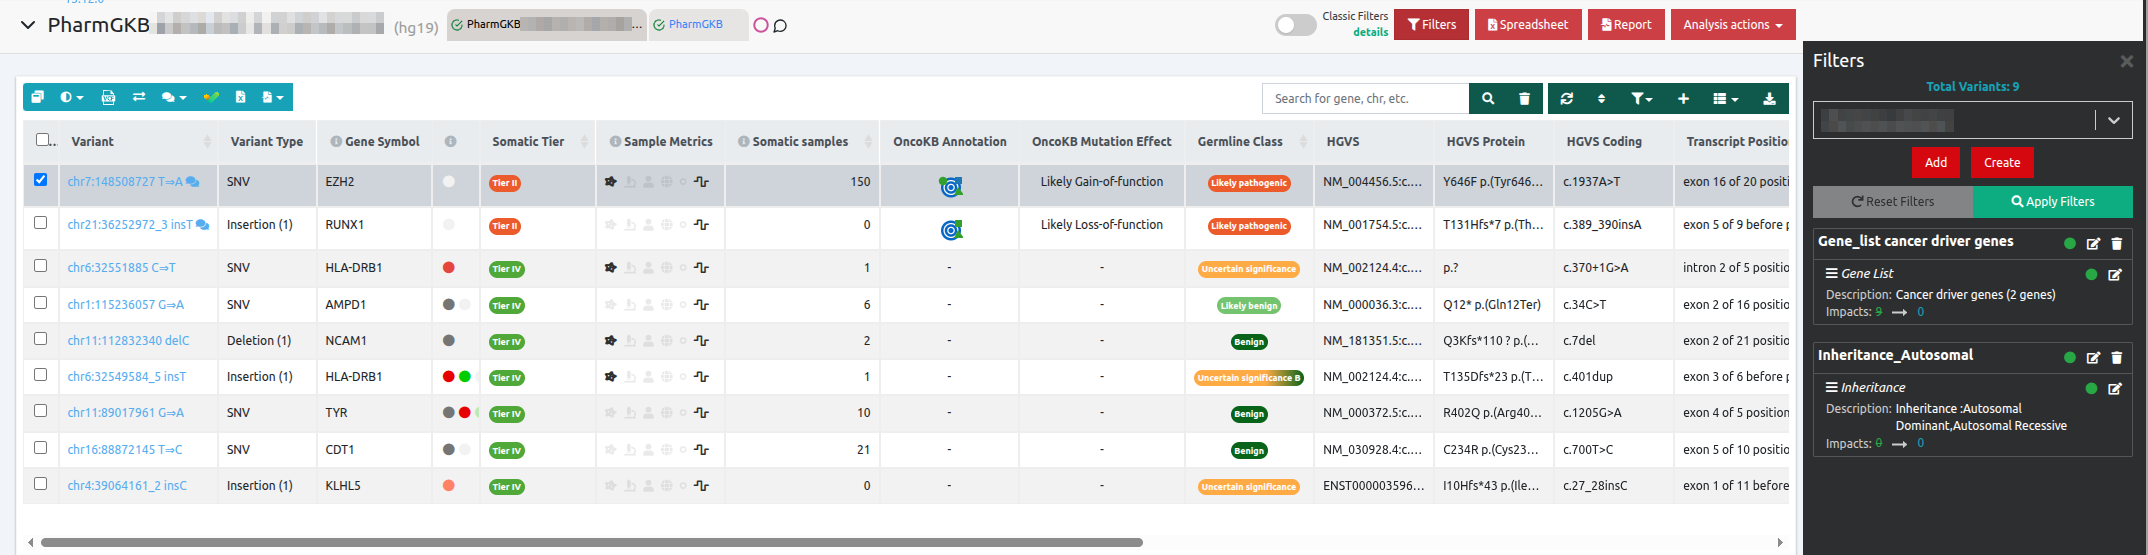
Applying an existing filter to a variant table
Clicking on the filter icon it opens the Filters menu where filter sets can be managed. To exit this menu, simply press "Esc" on your keyboard.
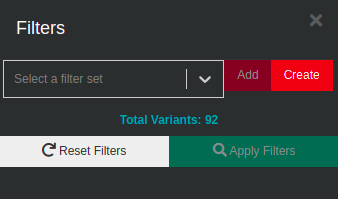
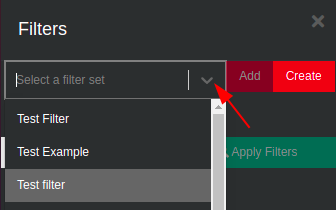
A drop-down list will show a list of all saved filter sets. Select a filter set from the already existing ones and add the selected filter set to the analysis with . To apply the selected filter set to the analysis select
.
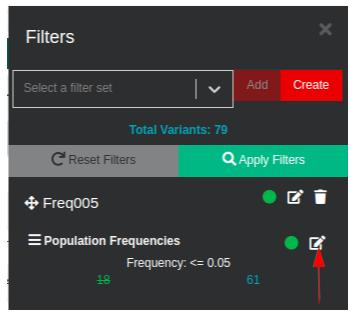
Each of the filters inside a filter set can be switched on and off by clicking on the green/red circles. Active filters have an associated green circle, and inactive filters have an associated red circle. Variants passing the filter are shown in blue, and variants that fail the filter are shown in green and crossed out. In the example below, all filters are active except the Function filter. Filters can be edited ![]() or removed
or removed ![]() .
.
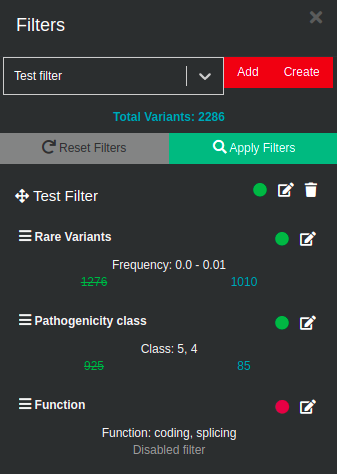
The order of the filters can be changed by moving the mouse on the top of the this icon ![]() , then dragging the filter and dropping it at the desired position. In the example below, the “Pathogenicity class” filter has been moved to the top position:
, then dragging the filter and dropping it at the desired position. In the example below, the “Pathogenicity class” filter has been moved to the top position:

Click on  to filter the original results of the variant table. The number of variants that pass the filter is also shown under the variant table. The number of rows of the variant table can be adjusted by selecting
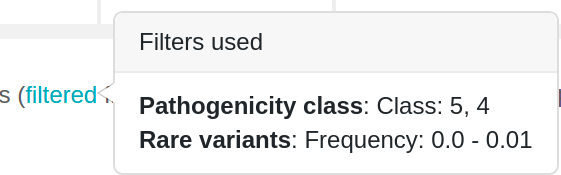
 ![]() . The filters used are shown when placing the cursor on "filtered".
. The filters used are shown when placing the cursor on "filtered".
When downloading all the filtered variants from the Variant table in Excel format there will be a separate tab called “Filters used” that lists which filters were used.
Please note that if existing filters with ACMG rules do not work, you will see an error message returned, like the following:
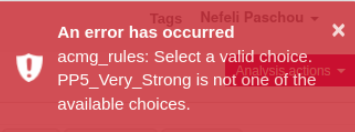
In this case you should edit (as shown above) the filter, by adding the rules you would like to have from the available options.
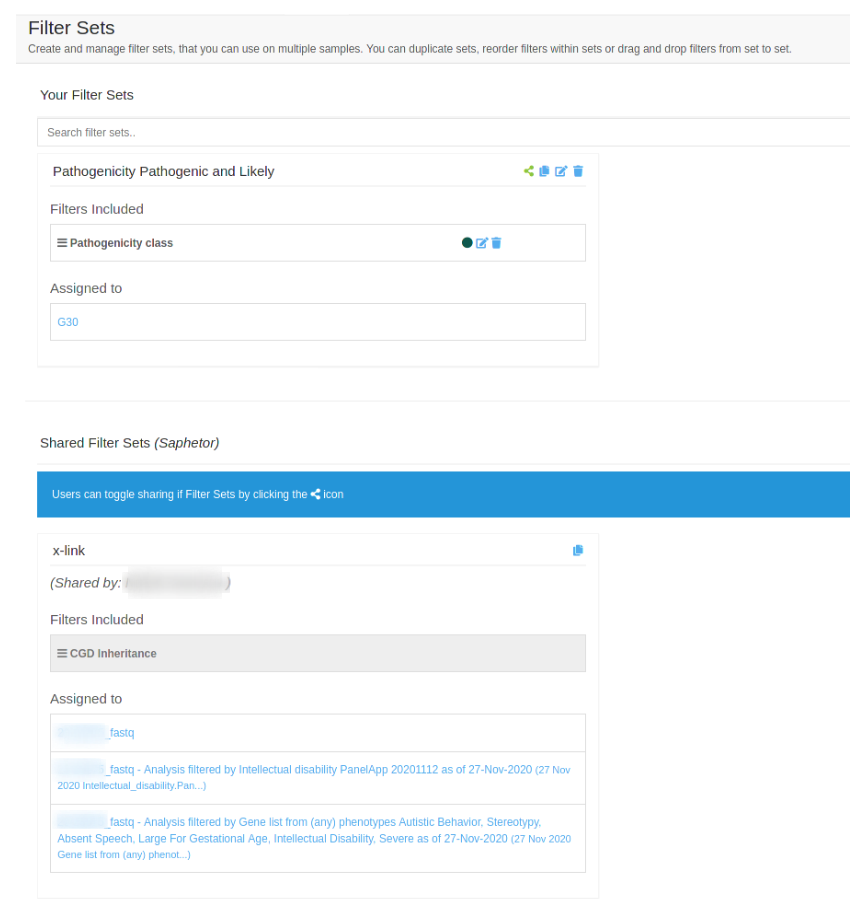
Shared Filters
Users of the same group can now share filters among them. To share a filter with other members of your group, click the Filters link at the navigation bar and then click the share icon on any of the filters you wish to share.
Filters that have been shared among members of the same group appear both on the Filters screen and when filtering a specific analysis. Although a shared filter can be used by anyone in the group, it can only be edited by the user who initially shared the filter. Other group members can still duplicate the filter and edit it.
In the analysis results page, click on the Filters icon , use the drop down list of the search box to select the shared filter of interest, click onto
the shared filter set to the analysis and then click on
.
The sharing icon is a click toggle to switch between sharing status. Filter sets shared with you will show up normally on the analysis side-panel alongside your owned filter sets (if they are shared, it will say by whom). Note that filter-sets sharing is only within VarSome Clinical organizations, you cannot share them, for example, with people outside your organization.
Care must be taken for shared filters because user-created filter sets are essentially composed of filter instances (e.g. a filter instance is the filtering of pathogenic variants), and filter instances can be turned on or off by the creator of the filter set. So, if the filter set is shared, other users who use this filter set may be able to apply it to their analyses, but may see that not all filter instances are enabled, and they can do nothing about it. If the original creator of the filter set chooses to, for example, disable a filter instance, then all other users who use that shared filter set will see changes in their results because of that. To avoid this you can duplicate the shared filter set as one of your own so that you have direct access to what is enabled or not.